|
Working with Modules
Content Sections
Module Introduction
A module is the building block of your lessons.
For example, you may create a module, unit, chapter, or lecture, for each week. A large majority of instructors organize their modules in weeks, adding lecture notes, activities, links, and resources that relate to that week's topic as 'sections' of the week's module. This allows them to guide learners through the sequence of content/tasks in an organized manner.
A module consists of one module page AND one or more content sections, depending on how you want to organize your information. Module pages are like the title page of a document -- on a module page you assign a title, add a description and keywords, if desired, and set the open and close dates the module is available.
Content is published in section pages. If you have a short topic, you may only want one section. If your module consists of multiple topics, resources, and materials, you want to break it up into several sections (meaningful chunks) for students for easier viewing and processing. When a student is reading a content section there will be breadcrumb links to next and previous sections, as well as the Table of Contents module list for easy navigation.There are four views for Modules: View, Author, Manage and Preferences.
View page:
Preview and access modules and sections as they look to students.
(Note: the list itself is not exactly as seen by students - see the images below. The sections themselves do look like they do to students.)
Instructor Preview of Student Side
The default view for students shows all modules expanded to show their included sections and subsections. Students can contract the view to show modules only (no sections) by clicking on the double-headed arrow at the top of the list, or on any of the down-pointed arrows to the left of each module.
Instructor preview of student view
showing closed module
Incidentally, modules that are not open to students (start date is in the future or end date is in the past), cannot be viewed by students. They will see the module title in the list but the link will not be active. They will be able to see the start and end dates so they'll know when it will be available.
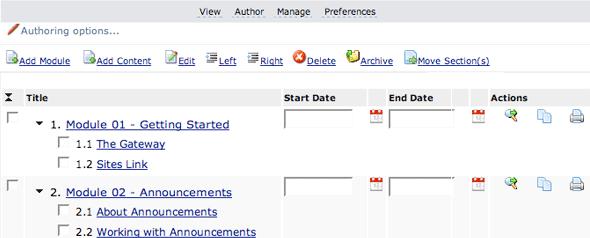
Author view page:
Add, edit, inactivate and delete modules and sections; set start and end dates; and create next steps statements in the Author View. As with the student view of the modules list, the default list view is expanded. Instructors can click on the little black arrows to condense/expand the view to show sections or not. Instructors can also change the default so the list opens automatically in condensed view.
Manage page:
Handle tasks such as restore inactive modules, sort modules and sections, and import/export modules to new sites.
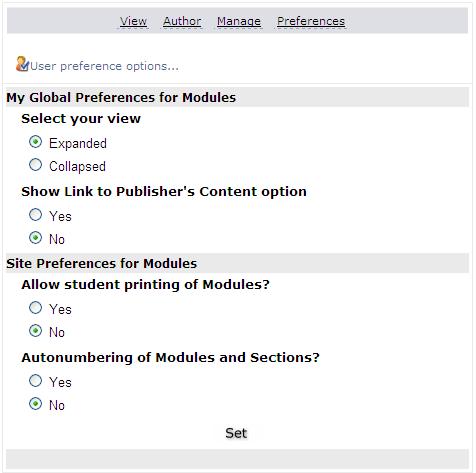
Preferences page:
Select if you prefer your module view to open expanded or collapsed. Also, you can click the black arrows in the list to switch to the other option. And lastly, set if you want students to be able to print out their modules or not.
Add Modules Back to top
The first steps of creating a new module (lesson) require you to provide information about module title, description, keywords and start and end dates. Added by and term/year fields is automatically inserted and cannot be edited.
Add a module as follows:
Click on the Author link at the top of the Module page.
Click the Add Module link.
Define the properties of your module.
Define Properties of a Module:
- The module title needs to be at least 1 character long. There is an upper limit, when the title is too long, it makes the Modules List page too wide to view nicely in your window, so that should remind you to shorten it.
- Titles can be a combination of letters and numbers. Most special characters are now allowed, but do NOT use the # sign -- it is not accepted.
- The description of the module should be less than 500 characters.
- Keywords for the module should be fewer than 250 characters. They should be words or phrases, separated by commas if necessary. They will be used for keyword searches when that feature is implemented.
- Added by and term/year are fixed fields. The information for these fields is provided automatically by the system.
- Set the Start and End Date for the module using the calendar widget.
- Leave the Start and End Date boxes empty if you want your modules to be open-ended and available throughout the entire term.
Final Steps When Adding a Module:
To proceed with a module addition, click on Add. You are directed to a confirmation page where you can Add Content Sections to your modules or return to the Author View. You can return to the module to add more sections at any time.
Notice that you have not yet published any content. The content of your module will be added to sections, as described below.
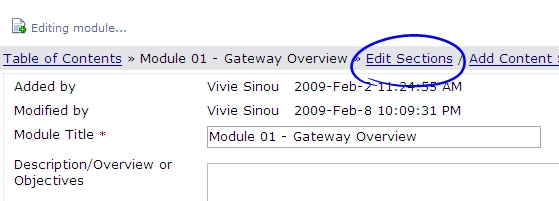
Edit Modules Back to top
To edit a module, follow these steps:
From the Author View page, click the checkbox next to the module. Then, click the Edit link at the top navigation bar. You will be directed to the Edit Module page where you can revise a module's properties.
Or, from the Author View page, click the title of the module you want to edit. You will be directed to the Edit Module page where you can make changes.
Once you have changed the module properties, complete the process:
Click Save to save your changes and return to the Author View page.
Click Add Content Sections to save changes and continue adding sections.
Click Cancel to discard changes and go back to the Author View page.
Delete Modules Back to top
You may select one or more modules to delete at a time.
On the Author View page, choose the module(s) you want to delete by clicking the checkbox left of the Module title. Then, click the Delete link at the top of the window.
A Deletion Warning asks you to confirm the delete action (not recoverable!). When you delete a module, all its sections and related uploaded files get deleted permanently as well.
If you are sure, click Continue to delete the module. If you are not sure about continuing with the deletion, click Cancel to abandon the process and return to the Author View page.
A confirmation page lists the module that you deleted. Click Return to Modules to return to the updated Author View page.
Module Actions Back to top
Actions
On the Modules List page (Author View), there are three Action columns on the right side. These actions are:
Next Steps
Duplicate Module
Print Module
Set Next Steps for a Module
You can set instructions at the end of every module to let students know what they should do after reading through that module. You may direct them to a quiz, assignment, or simply ask them to continue with the next module. To include next steps for a module, follow these steps:
- Click on Author to go to the Author View page.
- Click on the green and white round plus icon in the Next Steps column for the module you want to set instructions. Or, if editing existing Next Steps, click on the magnifying glass icon in the same column.
- Type the steps you want students to follow when finished with a module.
- Click Add to submit your content and return to Author View.
- What's Next? appears at the bottom of the Modules page.
As students navigate through the modules, clicking on "Next" after the last section of a module will display a separate screen with the next steps, if that information was provided by the instructor.
Duplicate Module
If you click on the Duplicate Module icon, that entire module and all the included sections is duplicated and placed at the bottom of the module list. You can tell which is the duplicated material because all titles (module & section) include, in parantheses, the date it was copied. You'll probably want to go in and edit those extra-long titles.
If you edit either the original or the duplicated version, the other is not affected.
Print Module
Click on the Print icon to print out a copy of the entire module. Well, actually that doesn't send it directly to the printer. When you click on the print icon, it pulls together an HTML document that you can then send to the printer. Simply click on the Print icon on the top of that page.
Incidentally, if you choose to allow students to print modules (in Preferences), they will also be able to print out entire modules.
Manage Modules Back to top
The following functions are available under Manage page:
Manage Content
Restore archived modules to Active list
Sort modules or sections of modules
Import/Export modules
Manage Content
Manage Content allows you to upload files, view already uploaded files, and delete files. This will be described in more detail in a following section.
Archive Module
You can make a module invisible to learners by archiving it. You may want to reveal material to students as the term progresses. It could be that you will not be using a module in the current term but you do not wish to delete it. When you want to make modules invisible but not delete them permanently, you want to use the Archive feature.
You can restore archived modules at any time by clicking on Manage and then on the Restore icon.
How to make modules inactive:
On the Author View page, click the checkbox located next to the module title you want to remove from the current list of active modules.
Then, click the Archive link located below the Author link.
A confirmation message will alert you that the chosen module is archived.
Note: Only modules can be archived. You cannot archive single sections of a module.
Restore Archived Modules
To restore an archived module, follow these steps:
Click on Manage on the top navigation bar.
Click the Restore icon.
A list of the archived modules is displayed.
Click the checkboxes located next to the archived modules to select them.
Click Restore to complete the operation.
A confirmation page displays the list of Modules that have been restored.
Click on Return to Modules to view the updated list of modules.
Sort Modules
To change the sequence of modules, follow these steps:
Click Manage... at the top navigation bar.
Click Sort.
On this page, there are two columns. The first is showing the current sequence of modules. The second column is your work area.
In the second column, click the module whose sequence you want to change. Then, click the up and down arrows to change the sequence. Click on the double headed arrows to jump the selected item to the top or bottom of the list.
There is no Save button. Simply click the Author link at the top of the page to return to the Table of Contents module list. They should now be resorted.
You may also sort the sections of a module. You can use Sort Sections button.
One or more modules can be exported in the Manage area. Then they can be imported into any site using Import, also found under Manage. This procedure is explained in a subsequent section.
Manage Content Back to top
Manage Content allows you to upload files, create links to URL addresses, preview previously uploaded files, and delete content items. You can create up to 10 file uploads or URL links at a time.
The advantage of using this method to upload files or create links is that it is MUCH, MUCH FASTER than creating these items one at a time. Once files have been uploaded or URL links created, you can easily use these resources when you're creating your module sections.Note: HTML files cannot be uploaded. You can upload image formats (.png, .gif, .jpg), word, excel, powerpoint, pdf, etc.
How to Manage Your Content
In Modules, click on the Manage link at the top of the window
Click on Manage Content link in the Managing options. area
Under New Item, choose to add File Upload or Create URL
Choose the number of items to upload - anywhere from 1 to 10 at a time
When the next box appears, fill in the correct information: either browse your local computer to identify the files you want to upload, or type in the correct URL addresses and titles (required) for web pages you want to upload.
Click Continue at the bottom of the page to upload your files or create your URL links.
Import and Export Modules Back to top
There are two ways to handle module import/export from one site to another. The first way is to use Import/Export from the Manage area. Another way to import modules into a different site involves Import from Site, found in the Site Info tool.
Export Modules (from within Modules >> Manage)
Use this export/import method if you want to save a backup file of your modules, or if you want to share them with a colleague. Also if you only want to export a few modules, not all in the site, use this method.
Exporting modules does not affect the current site's modules. This export functionality exports all of your modules and sections into an IMS Content Packaging (CP) zip file that you can import into your next term's site or other system that supports IMS CP.
Click on Manage.
Click on the Import/Export link.
Choose what to export (all, one, or several modules)
Note: Choose IMS Content Package format if you want to import into another ETUDES site.Click on Export.
What you are exporting is a ZIPPED folder with your chosen modules in it. Save this zipped folder in a convenient location. This is all you need to import the information into a new place.
You can import the zip file into the Learning Modules tool of another site you own or share it with a colleague if you so desire.
Import Modules (from within Modules >> Manage)
If you want to import modules you've exported from another site, it is a simple thing to do:
Click on Manage.
Click on the Import/Export link.
Browse the folder you exported from the other site. (The zipped folder.)
Then click on Import.
The files will be import and placed at the bottom of the list under any existing modules.
Add a New Section Back to top
Sections are the units within a module. Each module can consist of one or more sections.
You can get a new section page in many ways:
From the Author View page, check the box next to the title of the module/section you want to add a section to, and then click the Add Content link at the top.
After you are finished editing a module/section, click the Add Section link just below the top navigation bar to add another section to the module/section.
Define Properties of a Section
While inputting properties for a new section, you should be aware that:
The Section Title cannot be left empty.
Most special characters are allowed, but not the # sign.
After typing the title and instructions, choose the modality of the section's content.
Textual (text based)
Visual (flash files, images, etc.)
Auditory (sound files, i.e. .wav files)
Section Content Options Back to top
Methods for Adding Content in Sections
After you enter the section title and instructions and have checked the modality fields, select how you will create content for the section. There are several options:
Option 1: Compose content with editor
When you choose to add a section, the editor is displayed by default. You do not need to know HTML to use either editor, but if you do know HTML, you can code directly in the window. You can compose new content in the editor or copy/paste content from other sources, such as Word, html, or text.
Option 2: Upload or link to a file
Note: if you want an item to open in a new window (or tab), check in the Open in new window? box. A section's content can be an uploaded Word, Excel, pdf, etc. file.
If this is a new document to upload, browse to find it on your desktop. If the file has been uploaded previously, you can choose it from the list in the lower portion of the window. Preview the already uploaded by clicking on the title. Select a previously uploaded item by clicking on link to me in the right-hand column.
Option 3: Link to new or existing URL resource on server
Another option for adding content to a section is by linking to a web page that exists on the web.
Once again, if you want this web page to open in a new window, check the appropriate box.
Once you've inserted the URL address, you need to give it a short title.
If the URL has been previously created by you (either used before or uploaded in Manage>>Manage Content), it will be listed at the bottom of the window. You can preview this URL by clicking on the title, or select it to use by clicking on the link to me link.

Add, Edit, Sort & Move Sections Back to top
Add Sections Confirmation
When you click on the Add button after creating a new section, you will get a confirmation window:
At this point you can preview the section to see how it looks, add another new section, or finish. Finish takes you back to the Table of Contents module list.
Edit Sections of a Module
To edit a section of a module, there are a few ways to access the section:
On the Author View page, expand the module list to show sections. Check the box next to the section to be edited and click the Edit link at the top of the list. Or,
On the Author View page, expand the module list to show sections. Click the section title you want to edit.
On the Editing section... page,You CANNOT change the method for creating content. In other words, if the section was originally created using the content editor, you can change the contents within the editor, but you can't switch this section to be a link to a URL.
If you had originally created content as a link to a web page using a URL, you can replace that URL, but you can't make this section now be a downloadable document.
After editing the section, complete the process:
Click Save to save the edits.
Click Preview to view how the content will be displayed for students.
Click Cancel to discard the edits and return to the Author View.
Click Add Another Section to save the edits and add another section.
Click Finish to save the changes to the section and return to the Table of Contents module list.
Co-Authoring Tip: It is suggested that only one instructor make changes to a module at a time. If you will co-author content, establish regular authoring times with your partner or split modules.
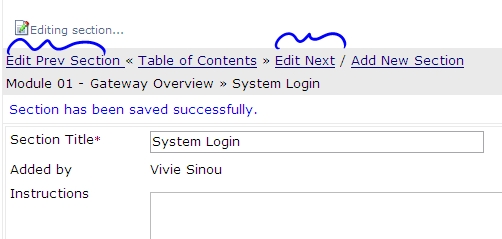
Editing Sections of a Module
You can navigate from a module's edit screen to the first section by clicking on the Edit Section Link.
You can navigate through all the sections of a module (back to back) to edit them or review them in author view by clicking on the "next" and "previous" links. See screen shot below.
These new edit links help you navigate through the sections of "one" module only to edit them. When you reach the last section of a module, you need to click to the Table of Contents to choose another module.
Moving Sections
Check the boxes next to the sections you want to move.
Click the Move Section(s) link at the top of the page.
In the list of modules that appears, click the radio button next to the topic you want these sections to be moved to. Click Save at the bottom of the window.
The selected sections will be moved to the new module, beneath any previously existing sections.
Subsections Back to top
What are subsections?
Take a look at a textbook's table of contents. They are often organized into chapters. Inside a chapter are several topics. Some of those topics may have subtopics; maybe even more than one level of subtopics, breaking up content.
Your modules area is organized in the same way. There are modules (chapters/ weeks) and sections (topics). Just as the book has subtopics, you can create subsections within sections. An example of this organizational chart is below:
There can be ten levels of subsections within a single section. That's not ten subsections, that's ten levels of indents. You have to create sections before you can start sub-sectioning them by using the left and right indent buttons.
How to Create Subsections
Once a section has been created, it can be "sub-sectioned."
You may want to sort it first, to make sure it is right below the section that it will belong to.
Then, click in the box next to the title on the Table of Contents module list.
With one (or more) section boxes checked, click on the Right Indent icon in the links at the top.
Notice there is also a Left indent icon. You can't make a section become a module by clicking the left indent icon. You can move subsections left to make them a higher level.